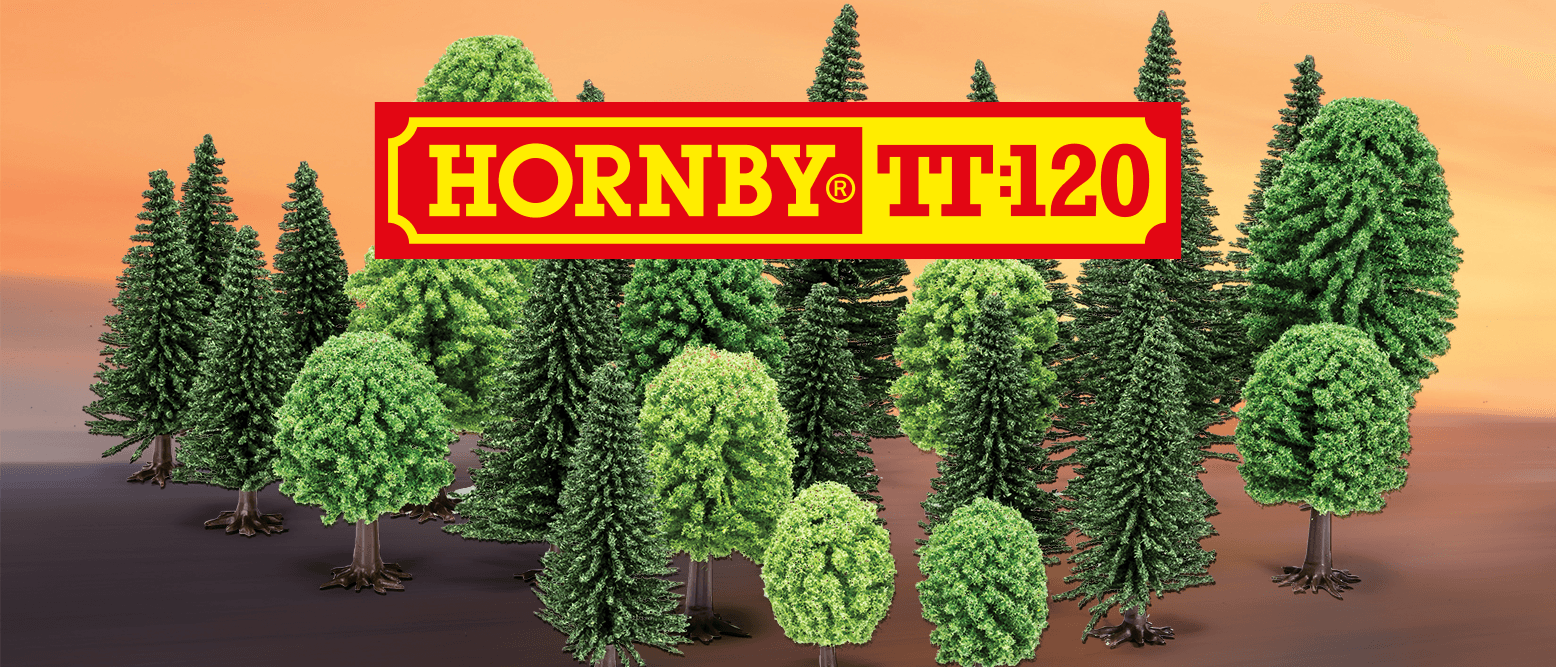
Why add scenery to your TT:120 model railway layout?
Placing scenery into your layout certainly adds a more pleasurable vista than just tracks laid on bare wood. For many, a layout with scenery, is an example of a 3D landscape with movement, while for others it creates the right backdrop for their model railway. Of course, for those who are new to the hobby it may seem a little daunting but the greatest fear while adding scenery to a layout is fear itself. If you look at nature all is random so there is no right or wrong way to position a tree or hedgerow providing it does not interfere with the running of the trains.
Start with the track - Adding track extension packs
Experiment, start slowly by first defining the track bed and then moving out from there by adding ground cover (scatter), trees, hedges, roads and buildings. Remember this is not a race and for many creating the ‘scene’ is the most rewarding part of the hobby. Keeping things simple is sound advice when building your first layout, which is why the following focuses on utilising the Hornby TT:120 Track Extension Packs layout illustrated on both the ‘Scotsman’ and the ‘Easterner’ train set packs.
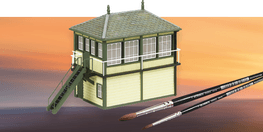
The Hornby TT:120 pre-painted resin buildings range is being added to on a continuous basis and will eventually offer a wide selection of both domestic and railway-type buildings which will add a real touch of realism and authenticity to your layout.
Before starting, plan your layout. Decide how far you wish to extend the layout included in the Hornby TT:120 train set and the number of Track Pack Extension packs you wish to add. After that consider the scenic effects. Hornby SkaleScenics offers an extensive range of ground cover (scatter), trees, foliage and ballast for the track. It is recommended that you obtain a selection of the scenic material and in particular the track ballast remembering that you can always add more trees, fields, hedges and even buildings as time progresses. As has been said many times, a model railway is never finished and that probably applies more when it is the first layout you build.
Continuing with the advice of keeping things simple, the following step-by-step instructions will take you through each stage of building your layout. As your confidence increases, don't be afraid to add your own influences to the layout.
How to plan out your layout (track and scenics)

1. Find your workspace
Lay your 54” x 40” (137cms x 102cms) baseboard onto a flat surface.

2. Locate track plans
Locate the complete layout diagram on the train set pack which shows in stages the step-by-step progression of the Track Extension packs of B, C, D and E.

3. Add at your own pace
As the baseboard is 54” x 40” (137cms x 102cms) the following is a step-by-step guide to building the complete layout as illustrated on the set box but such is the design of the system you can stop adding Track Packs at any point without compromising the layout operating characteristics. With this in mind, you can continue adding the remaining Track Packs as and when time and budget allows.

4. Mark out key features
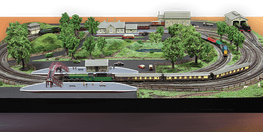
The first stage of building your Hornby TT:120 layout is to mark on the baseboard where the track, roads and buildings will be positioned. Use the full colour image shown on the Hornby TT:120 train set as a guide.

5. Test track & building positions
You will first need to assemble the track circuit and then position the buildings. The trees, hedges and bushes can be positioned once the scenic material has been applied.

6. Prepare for the next steps
To assemble the track circuit, follow these simple step-by-step instructions.

Joining track pieces
When joining two pieces of Hornby TT:120 track together, lay them both on a flat surface and slide the track together, lining up the rail ends with the track joiners. Once aligned, carefully push them together. When you have pushed the track together, run your finger over the join to make sure that the track ends are correctly located in the rail joiners. If you carefully look under each piece of track you will see a number, for example, TT8003, TT8007 etc. These numbers refer to the actual track piece.

7. Lay out your extensions packs
To assemble the circuit, it is best that you do so in stages, first starting with the track circuit included in the train set and then adding one Extension pack after another. Remember to add the Track Packs in sequence starting with Pack B and then Pack C followed by Pack D. There is no need to connect the track together at this stage just lay the track pieces in sequence as shown in the above diagrams which are also shown on the train set and Track Pack boxes.

8. Connect the track pieces
Having laid out the track you can now start to connect each piece one at a time. It is important that you take your time at this stage, making sure that each piece is correctly inserted into the track joiners (fishplates). Refer to the Top Tip above for checking that each piece of track is correctly connected.

9. Position the assembled track on the baseboard
Having connected all the track, you can now manoeuvre the assembled circuit into position. Ensure the track has not come apart or become misshaped while positioned.

10. Mark out where ballast will be applied
Once you are satisfied that the track is as it should be, roughly draw around both edges of the track. In between these lines is where you will apply the ballast material.

11. Place station buildings as shown
Place the station buildings onto the board as shown in the completed track image. (Show aerial view of the building in situ)

12. Mark out building positions
Draw around the buildings and write in the centre the name of the building.

13. Mark out roads and other features
Using the layout image above as a guide, draw in paths, roads and field areas. There is no need to be too precise, you may even wish to add or change what is shown. Remember it is your layout.

14. Remove track and buildings from the baseboard
Once completed remove all the buildings and track. There is no need to disassemble the track completely. You may find it easier just to separate the circuit into manageable sections. See illustration. (Fig. ?)
How to lay track ballast
1. Mix glue
Mix some PVA (wood glue) with water so it has a smooth consistency. Approximately 50/50.
2. Apply glue to the baseboard
Using a 1” (300mm) paintbrush, apply the glue in between the lines you drew on either side of the track. Do not worry if you go over the lines. Apply the glue in small sections, approximately 18” at a time.
3. Apply ballast to baseboard
Open the bag of R7165 grey ballast, or any other ballast that is included in the SkaleScenic range, the choice is yours and carefully sprinkle the ballast over the wet glue. You may find it easier to use a small sieve to help sprinkle the ballast evenly.
4. Continue to add ballast around the layout
Once you have applied the ballast to the first section move onto the next and repeat the process.
5. Wait for glue to dry - remove excess ballast
After applying the ballast to all the track areas, wait for the glue to dry thoroughly and then tip the board up so that any loose ballast falls away. Tipping the board onto a piece of newspaper is advisable so the excess ballast can be collected up for use again. You may find an easier option is to use a small dustpan and brush to sweep up the residue rather than tip up the board.
6. Fill in any gaps
Any ‘thin’ areas of ballast can be simply filled by painting glue over the area again and sprinkling more ballast onto the missing or ‘thin’ area.
Ensure the ballast is evenly spread
This can be a laborious process but if you rush things the chances are that the ballast will go down thinly, and you will have to go over the area again to cover up the areas that you missed.
How to lay and fix track
1. Place track back on the baseboard
Once all the ballast has been applied and allowed to dry reassemble the track and place the whole circuit over the ballasted area.
2. Check track position before pinning
Once in position and ensuring the track is correctly joined together and has not become misshaped, plus ensuring the ballasted area corresponds with the track, you are now ready to pin the track into position.
3. Prepare tools for pinning the track
Tools required: a small hammer, small pair of long nose pliers (not essential).
4. Locate track pin holes
You will notice that on each piece of track that there are small holes in the middle of one or two sleepers. (See Fig. ?). These are for the track pins to hold the track in position.
5. Re-check track placement
Having positioned the layout and making sure that each track piece is correctly connected you are now ready to start pinning the track down.
6. Start applying the track pins
Recommended product for this next stage – TT8025 Track Pins. Starting with the point that was included in the train set layout, locate the pinhole situated in the middle of one of the sleepers on the straight section of the point and place a pin in the hole. (Please note some track pieces have more than one hole. It is not necessary to use every hole. One pin per track will be sufficient)
7. Continue applying the track pins
Holding the pin carefully with either the thin-nosed pliers or by fingertips, gently tap the nail into the baseboard so that the head of the pin is not quite touching the sleeper.
8. Work your way around the track
Having fixed the point and moving to your right, while at the same time making sure that the whole circuit is still in position, pin down the next piece of track.
9. Finish pinning and check track
Gradually moving in a clockwise direction, pin each piece of track down in turn. Having completed the outer oval you can now pin down the inner oval after which move on to the outer sidings and finally the inner siding. Remember not to knock the pins in too far. Allow the head of the pins to not quite touch the sleeper. Once again, please make sure before pinning the track pieces down that they are correctly aligned and properly connected. To double check, remember to run your finger over the join to make sure that the track ends are correctly located in the rail joiners.
Take your time
Take your time as you progress in pinning down the track.
How to add scenic material to your Hornby TT:120 layout
Hornby’s comprehensive range of SkaleScenics offers a variety of scenic materials including trees and bushes, plus a large selection of ground cover (scatter) representing a broad selection of varied vegetation in numerous colours and textures. Adding different colours and textures of ‘scatter’ to a field or garden can add depth as well as a pleasing effect and prevents a model railway from looking too uniform.
1. Prepare to add roads and fields
Having carefully pinned the track into position, you can now start to add the fields and roadways.
2. Paint the roads
To paint the roadways and paths that you marked out earlier, it is recommended that you use Humbrol No. 32 matt dark grey paint; a small 12ml size Humbrol tin should be sufficient. Using the small paintbrush apply the ‘roadway’ but remember to clean the brush once you have finished.
3. Give time for the paint to dry
Allow the paint to dry and once dry you can then look at applying the scenic scatter material to the rest of the baseboard.
4. Apply glue for the fields & grass
Using the image shown as a guide, paint (Repeat aerial image of completed layout) the area which you wish to scenic with either the PVA wood glue mix or ideally the R7183 SkaleScenics Grass Glue ensuring to leave areas where the buildings will be positioned free from the material and then applying your selected ground cover/ scatter material to the chosen area.
5. Tips for grass application
For a more pleasing effect you can, if you wish, paint and sprinkle the scatter material a few millimetres over the building outlines. This will give the impression when the buildings are added to the layout that the ‘grass’ etc. grows right up to the walls of the buildings. You may find using a domestic cooking sieve useful to obtain an even coverage but if one is not available carefully sprinkle the material over the glued area using your fingers. Should you prefer to use the SkaleScenics Static Grass material then it is strongly recommended that you invest in the SkaleScenics Static Grass Puffer Bottle applicator to obtain some truly pleasing and realistic effects. Remember not to try and cover too large an area in one go as the glue may dry before you have applied the scatter or grass.
6. Collect loose excess flock material
Once you have allowed the glue to dry, tip the layout onto a piece of newspaper and collect up the residual material, or alternatively use a small dustpan and brush. Similar to the ballast material, if you find areas where the scatter material has not adhered or you wish to increase the density, go over the area again with the glue and sprinkle the scatter onto the glued area once more. Alternatively, you can use the static grass and applicator which certainly does add a pleasing and realistic ‘rough’ grass effect. Once you are happy with the coverage you can then move on to the next section.
7. Consider using other coloured flocking
As mentioned, Hornby’s extensive SkaleScenics range has a vast selection of scenic material that you can use to enhance your layout and achieve a truly impressive effect. For example, you can use the R7171 Flower Meadow and R7174 Brown mixed together. There are areas where you would only use Brown scatter and others that are more suited to Flower Meadow, however, there is no reason why in certain parts of the layout you cannot mix the two scatter materials together to give you different colours and textures. Why not try it? You can’t do any harm.
Adding trees and foliage to your TT:120 layout
1. Position and glue trees in place
Once again using the layout image as a guide, position the trees on the layout and glue them in place using the SkaleScenics Glue or a suitable impact adhesive. Of course, you may wish to add more trees, hedges and other scenic effects so there is no need for you to be constrained by what is shown on the layout image. It is your layout so why not make it more individual?
2. Consider push fit trees
Should you wish the trees to be removable, for example when storing the layout under a bed where height is limited, it is recommended that you carefully cut the bases off the trees, drill a suitable sized hole in the baseboard and push the trunks of the trees into their respective locating holes.
3. Add bushes and hedges
For bushes and hedgerows, once again SkaleScenics have a suitable selection to choose from. Lichen or foliage material both make excellent bushes. By separating the lichen and foliage into varied-sized pieces, then glueing them into position on your layout using PVA wood glue and allowing them to dry, you can quickly cover gardens and hedgerows with a realistic canopy of different coloured pieces of the vegetation.
How to place & and fix buildings
1. Position the buildings
Once all the glue has dried and you are happy with the overall scenic finish you can now add the buildings to the layout. All you have to do is position the buildings in the areas marked and you are nearly there.
2. Decide whether buildings need to be fixed
You can lightly glue the buildings in place if you wish them to be permanent, however, if you are storing your layout under a bed with restricted height you may need to have the buildings removable so they can be stored elsewhere ready for the next railway session.
Add fencing to your layout
Currently, there are no dedicated TT:120 fences available from Hornby, however, it is possible to create some by removing the top bars from the Hornby R537 Lineside Fencing pack to create suitable-sized fencing.
Once glued in position using a good impact adhesive the fencing can be ‘decorated’ quite effectively with SkaleScenics Lichen or Foliage to represent climbing brambles, bushes, ivy etc. All adding realism to your layout.
To conclude
Consider how large you want your layout to be and balance this with your budget. Decide how you wish to control your layout (either DCC or DC analogue), keeping in mind that you can start with DC and then in time convert to DCC at a later date.
Above all, remember that you are not painting a room or building a patio but creating a pastime where there really is no end to what you can achieve - the only time constraints are those you impose on yourself. Many seasoned modellers never finish their layouts but continually change, upgrade and rebuild, such is the joy of the hobby. It is a never-ending story.
Explore other TT:120 tips


Shop the range
Discover the full Hornby TT:120 range. Don't miss your chance to join the free Hornby TT:120 Digital Club for exclusive members-only benefits.
View the range