
Wondering what decoders are and what they do? We’re here to demystify decoders, so you can take your analogue train layout to digital success!
The technology around the model railway industry is evolving at an incredible pace and decoders have done their bit to revolutionise the hobby. These tiny chips can be added to certain models to receive signals from your digital device. These signals control the locomotives movements, sounds, lighting and all kinds of other useful things.
The most important benefit is that you can control your locomotives independently without having to pick them up off the track.
With analogue control, you supply a variable voltage to the track, so every locomotive on that ‘live’ section of track, will respond and move in the same direction.
Under DCC or Bluetooth control, you can have complete independent operation of each locomotive, with numerous lighting and sound options, generating a more realistic environment for your model railway.
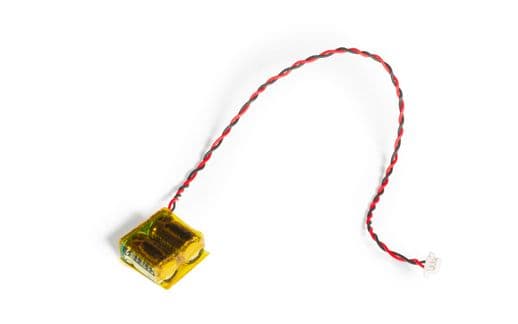
Each locomotive that is DCC/Bluetooth controlled must have a small microprocessor-based receiver called a decoder fitted inside.
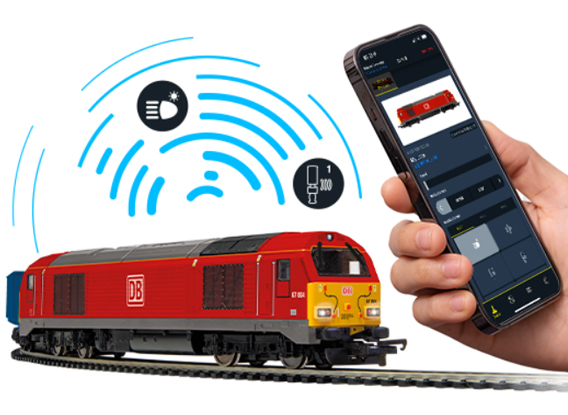
The decoder is capable of ‘picking up’ the control signals from any digital system or via Bluetooth and the HM7000 app. It converts these signals into actions such as moving forward and reversing at a determined speed, stopping and starting and, in some instances, switching the locomotive’s lights on and off.
There are different decoders for different roles on your model railway layout. These include:
· Standard decoders: These decoders are for your DCC-ready locomotive models and allow you to control the speed, direction and lighting.
· Sound decoders: These do everything that the standard decoders do, but you can also play a range of sounds through them.
· Accessory decoders: The DCC fun isn’t limited to locomotives – these decoders give you control over your railway points, signals, turntables and other accessories.
These decoders are separated according to their connection type. There are lots of different connections, but the most popular ones are:
· 4 and 6-pin
· 8-pin
· Next18-pin
· 21-pin
Generally, the more ‘pins’ your decoder has, the more functions you’ll be able to manage. But unless you want to do some significant rewiring of your model, you’ll have little choice over which decoder goes in which model. Check the product description and the box that your locomotive came in to see which decoder you need.
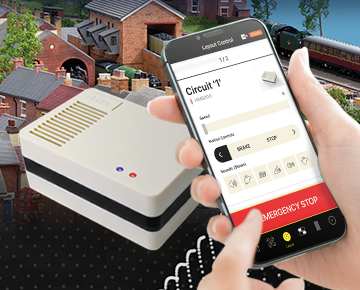
Decoders work as the brains of the model, receiving signals from a digital command centre (a controller or your smart device). This gives you complete control over things like the speed, direction, sounds and lights on each individual model.
Each decoder has a unique “address” or identifying number, so there’s no chance of your models getting muddled up in the controller. This gives you more targeted control, so your model railway layout works as you want it to.

Before fitting a decoder, check what socket type your model has and that it has the available space required to fit the decoder, speaker (for sound versions) and for greater reliable running, a power bank (this keeps locomotives running for a short time if there is a temporary outage).
The type of socket tells you which type of decoder you’ll need. For example, a 21-pin socket takes a 21-pin decoder.
Then follow these steps:
· Check the manufacturer instructions that came with your model to find out where the DCC socket is positioned.
· Open up the locomotive up and locate the socket.
· Remove the blanking plug and tape it to the inside of the packaging so as not to lose it. Make sure you align the decoder correctly. For example, on 8-pin decoders the orange wire is labelled pin 1. This should align with pin 1 of the socket in the locomotive.
For 21 pin decoders, check the correct orientation for fitment. This needs to align correctly with the pin header in the locomotive.
· Press the decoder carefully into place.
Then all that’s left to do is securely replace the body shell, replace the screws and connect to your smart phone.
If you need a visual representation of how this is done, click here.
Once you’ve got your decoder in place, it’s time to set it up.
Once you have logged into your Hornby account from the app, you will be taken to the Settings page. Follow these steps:
· Tap Link Device
· Tap Start Scan
· The scan will take about 10 seconds and will then display the decoder ID (something like “HM7000_abcd”) under the words Ready to Link.
· Press the square containing the decoder ID to start linking the decoder.
· You will then be taken to the Locomotive Settings page where the decoder is now linked.
Once you’re in the Locomotive Settings page, you can edit your loco settings under Basic Information.
Here you can give your decoder a new address and name, such as Flying Scotsman, Mallard, Prince of Wales or maybe a running number. This will make the locomotive easier to find in the app.
In the Control Mode panel, press the setting you desire, such as Bluetooth or DCC. Bluetooth is set by default.
If you scroll down the Locomotive Settings page, you will find other aspects of the decoder that you can preset, such as Acceleration/Deceleration, Global Sound Volume, Import/Export Function Set up and, most importantly, Locomotive Profiles.
If yours is a sound decoder, you can download and install sound profiles:
· Tap the Browse Profiles button. Here you will find a complete list of all available Locomotive Profiles. Scroll through the list and tap the locomotive profile you desire.
· You will then go to the Manage Profile screen, which shows details of the profile you selected.
· Tap the Install Locomotive Profile button and the app will update the decoder. The process takes about 10-15 minutes, with a progress bar at the bottom of the screen giving you an estimated time until completion.
· When the completion message pops up, dismiss it and return to the Manage Profile screen.
· Scroll down to the Import Function Map and Running Profile button. When you tap this, the installation is complete.
· Check the Locomotive is present in the Control Screen by tapping the joystick icon at the bottom left of the screen. Your installed locomotives will appear in a horizontal list at the top of the screen.
· Tap on your new Locomotive and scroll down to view the pre-set Function Buttons. You can now put your locomotive to the test on your tracks.
We’ve got a great video to help you with this. Watch it here.

The above steps will ensure decoder success. But, just in case, we’ve troubleshooted some of the most common issues.
· Decoder not recognised: If your app cannot find your decoder, there are a few things you can try. Firstly, make sure your app is updated to the latest version. Then try fully closing the app and reopening it. You can also try lifting the locomotive off the track and replacing it.
· Locomotive not moving: This is likely due to a connection issue. Make sure the locomotive is set up in the app properly and that the wheels and track are clean. Finally, check for loose or broken track connections.
If the above tips aren’t working or you have another problem, please get in touch with us at customerservices.uk@hornby.com
There’s no need to be intimidated by the idea of decoders – once you’ve got the hang of them, they can really elevate your hobby experience, bringing more joy and realism to your model railway layout.
For more information on the HM7000 system and its benefits, read this useful article.